Wednesday, September 29, 2010
Cafe Con Leche
I'm fortunate enough to have experienced a lot of Latin American food. Having been raised in a Cuban household/living in Miami for so many years, I know a thing or two about good Latin American grub. When I moved up to Chicago, I figured that this was just one of the things I'd have to sacrifice to live in the big city, and boy was I wrong! Granted, you can't find Cuban food at every corner and I've only heard of one Argentinian restaurant in Chicago but there are still many great options.
One of these great options for tasty food is Cafe Con Leche in Logan Square (the best neighborhood in Chicago for those of you not familiar); not to be confused with the one in Wicker Park/Bucktown. I'm not even sure if they are the same place or have the same owner, but I've never been to the one in WP so I can't speak for it. The one in Logan Square, however, is amazing! I ordered a breakfast sandwich and a cafe con leche for under $10! The food was amazing, the servers friendly and the music was fun. They had lots of typical Cuban and Puerto Rican sandwiches on the menu that I'm definitely going to have to try next time I go. The coffee was A+ and the sandwich was perfect! Not to mention that it's nearby my house, so I can go whenever.
Martha's Butternut Squash Risotto
On my quest for canned pumpkin, I found REAL pumpkins (more on this later) right at the French Market as well as some butternut squash! I decided to grab the squash on a whim, and then I started looking up recipes... and then I bought some Parmesan and some white wine... So, I made some Butternut Squash Risotto. I decided to use Martha Stewart's recipe because it looked pretty simple (as far as risotto goes, since it's a naturally annoying and time consuming thing to make).
First off, make sure that the white wine you buy is one that you'll enjoy drinking as well. I got a good recommendation from the dudes at Pastoral for the dry white wine (and Parmesan) part of the recipe, and was able to sip this wine the entire time I was stirring the risotto (which was a looong time). Plus, I liked the name a lot!
You should also be aware that this will lead to a really messy and dirty kitchen, proof:
But that's beside the point of this post. This was a very tasty and delicious dish and I highly recommend it to everyone! Here goes:
While the chicken broth is warming up, peel, seed and dice your butternut squash and set aside. Melt 1.5 tablespoons of butter in a big, deep pan.
First off, make sure that the white wine you buy is one that you'll enjoy drinking as well. I got a good recommendation from the dudes at Pastoral for the dry white wine (and Parmesan) part of the recipe, and was able to sip this wine the entire time I was stirring the risotto (which was a looong time). Plus, I liked the name a lot!
But that's beside the point of this post. This was a very tasty and delicious dish and I highly recommend it to everyone! Here goes:
Martha's Butternut Squash Risotto
Recipe slightly adapted from Martha Stewart
What You'll Need:
- LOTS of butter (I used about 2-3 tablespoons)
- 1.5 lbs of Butternut Squash (peeled, seeded and diced into 1/2 inch chunks)
- Coarse salt and pepper
- 1 cup Arborio rice
- 3/4 cup white wine
- 3 1/2 cups chicken broth
- 1/3 cup parmesan
- 1 tablespoon fresh chopped sage
First, start warming up your chicken broth (first on high heat, then on low to keep it warm while you're cooking/stirring)
While the chicken broth is warming up, peel, seed and dice your butternut squash and set aside. Melt 1.5 tablespoons of butter in a big, deep pan.
Throw Squash in pan. Stir.
Add in coarse salt and pepper, keep stirring and cook for about 8 mins, until the edges soften.
Add rice, stir to coat. It'll look like there's way too much squash compared to the amount of rice but don't worry!
Throw in the wine and stir until all the liquid has evaporated, about 1 to 2 mins.
Reduce heat to medium-low and throw in 1/2 cup of warm chicken broth. Cook, stirring, until all liquid is absorbed. Repeat, 1/2 cup at a time until all broth is gone (35-40 mins total).
In the meantime, grate your parmesan if need be and chop up your sage.
When you have used up all of your chicken broth, throw in parmesan and sage. Stir for a minute or two then serve immediately. Top with extra sage and parmesan for garnish and enjoy!
Serves about 4.
P.S. Andrew toasted the squash seeds and they were delicious! Just preheat your oven to 275 degrees, place seeds on tin foil and top with salt and olive oil (we used truffle oil) to taste. Put the seeds in the oven and bake for about 15 mins!
Sunday, September 26, 2010
Zara Fall 2010
Zara's been killing me lately, their stuff for this Fall is amazing! Here are a few things I want/my favorite items:
Images from Zara.
Etsy Finds
Due to the fact that I couldn't find ANY pureed pumpkin in the 5-mile radius, there will be no recipe posts today. However, here are a few wonderful things I've found on Etsy that I wanted to share with everyone:
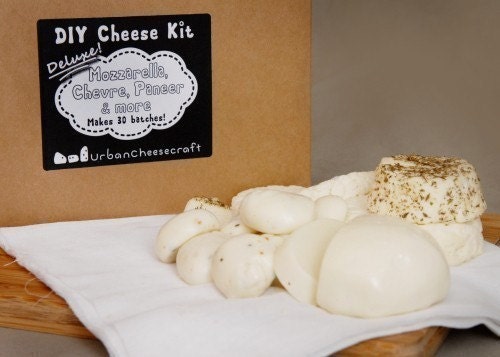 | ||
| Deluxe DIY Cheese Kit by UrbanCheeseCraft |
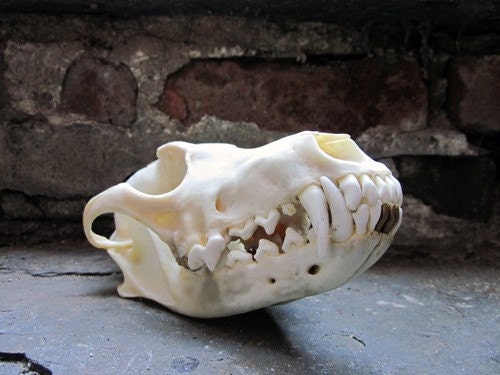 | ||
| Gold Tooth Coyote Skull by feistberger |
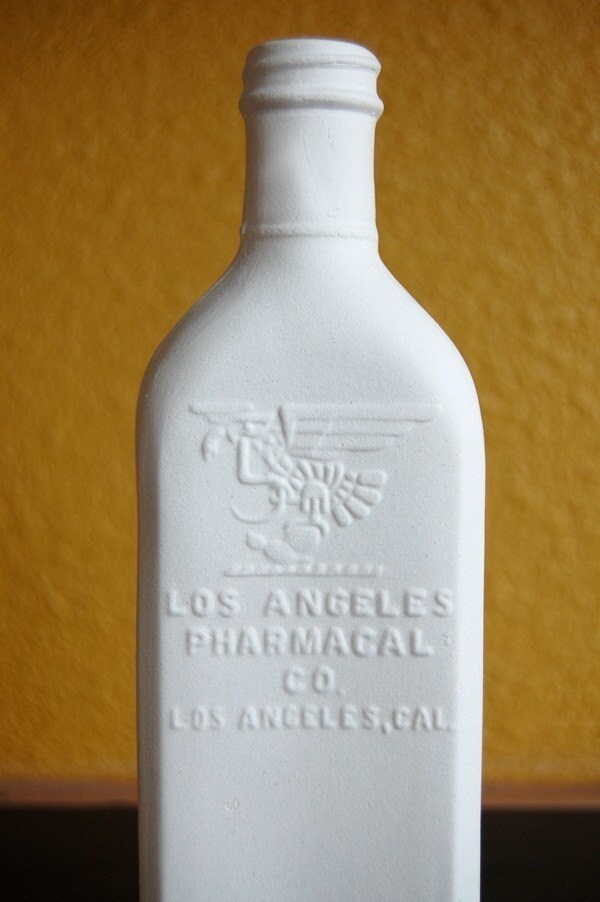 | ||
| Cast Pharmacy Bottle by PigeonToeCeramics |
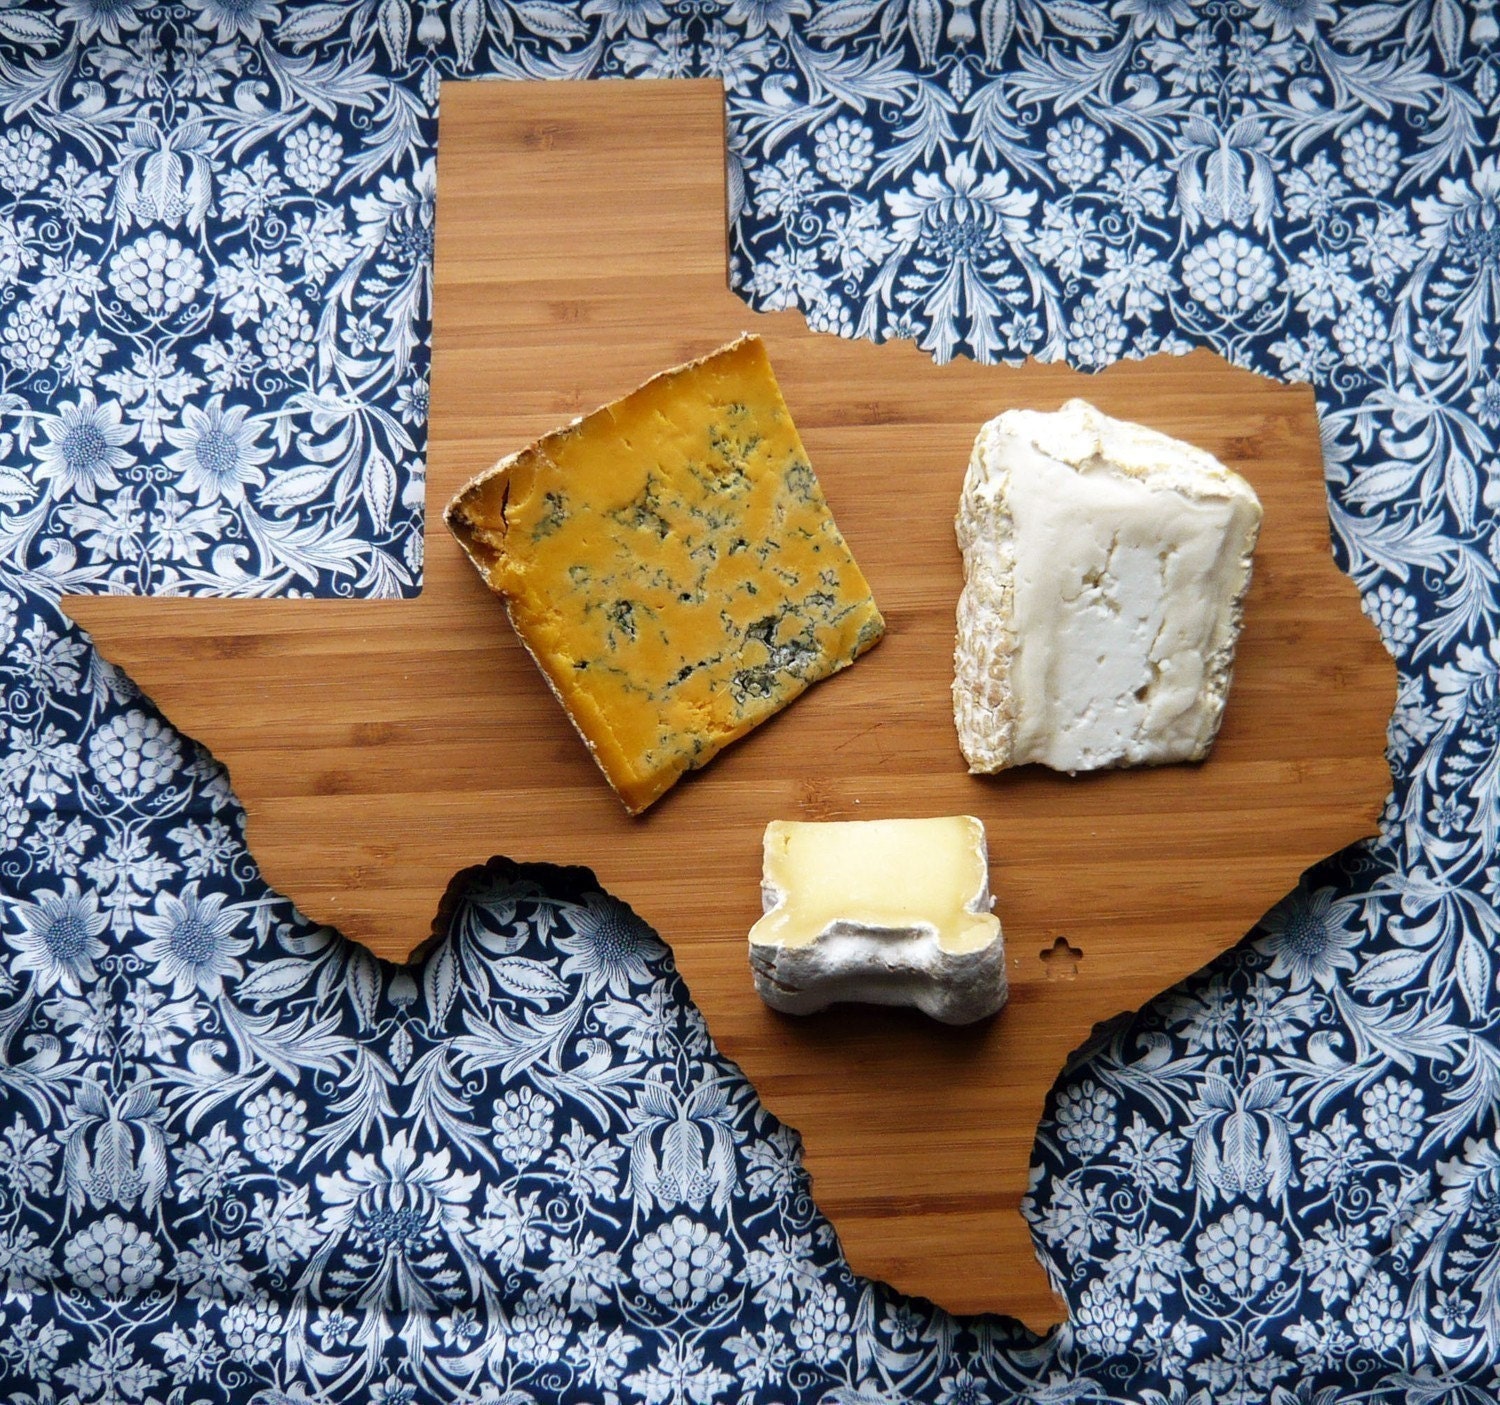 | |||||
| Texas Cutting Board by AHeirloom |
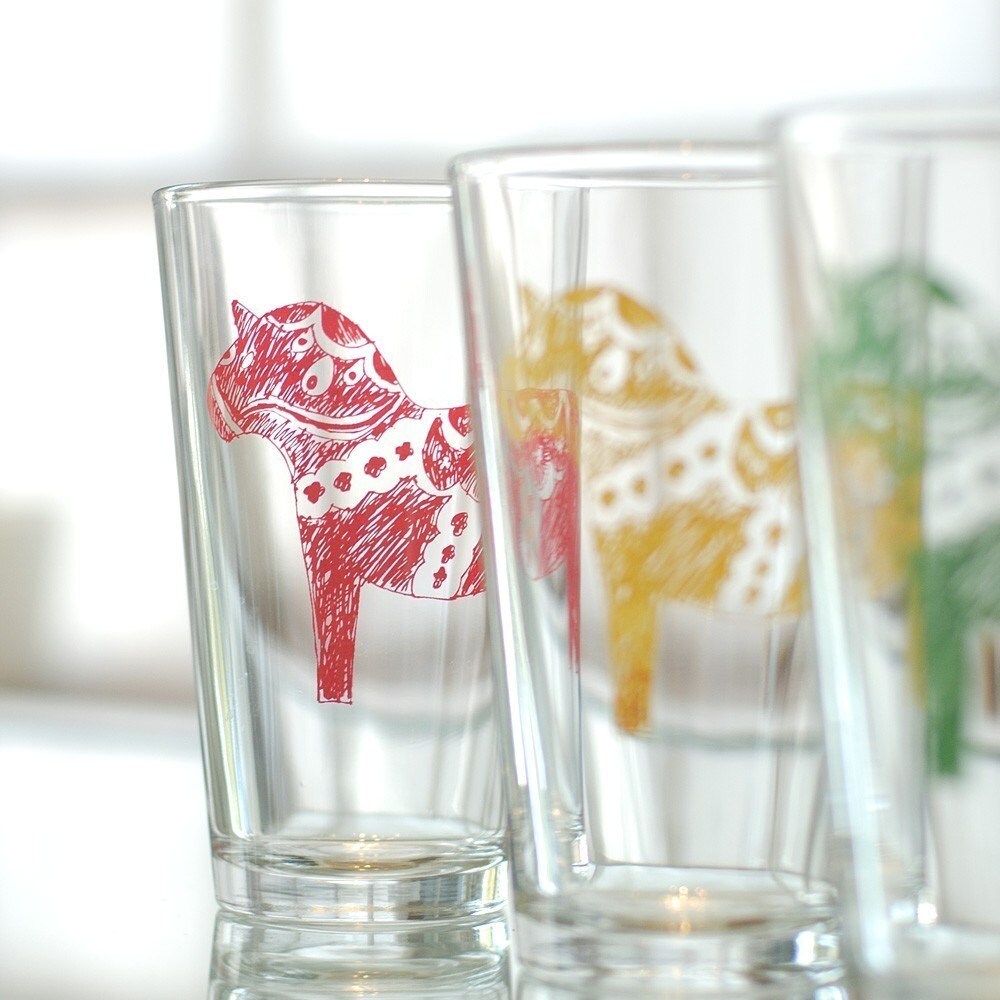 |
| Dala Horse Pint Glasses by vital |
| Thank you Kate from Full Frontal Frommage for the link to the cheese cutting boards! They are amazing. |
Fashion Post!
Hi y'all! I have exciting news: I got my camera back!! The funny thing is I didn't even use it for the pictures I will be using in this post, but I will be for the next post!
I'm actually on my way to get supplies for the recipe I will be posting today, and I thought I'd share my fashions with you. Here in Chicago, the weather has been slowly dropping since the Equinox. Today it's 57 degrees! Just last week it was 90. I love Chicago's drastic weather changes. Anyway, I've been stocking up on fall/winter goodies at the thrift store and I've found many gems including my newest and most favorite coat; it's a navy blue toggle coat from American Eagle. I've been looking for a perfect one all over the internet and stores with no luck! All of the good ones were over $400 and that's just not in my budget right now. I got extremely lucky with this coat yesterday seeing as I not only almost cried when I saw it on the rack, but everything was 1/2 off so I got it for $4.50!
I call this the "I Don't Plan On Showering At All Today" look.
Next post will be very, very soon! Happy fall!
I'm actually on my way to get supplies for the recipe I will be posting today, and I thought I'd share my fashions with you. Here in Chicago, the weather has been slowly dropping since the Equinox. Today it's 57 degrees! Just last week it was 90. I love Chicago's drastic weather changes. Anyway, I've been stocking up on fall/winter goodies at the thrift store and I've found many gems including my newest and most favorite coat; it's a navy blue toggle coat from American Eagle. I've been looking for a perfect one all over the internet and stores with no luck! All of the good ones were over $400 and that's just not in my budget right now. I got extremely lucky with this coat yesterday seeing as I not only almost cried when I saw it on the rack, but everything was 1/2 off so I got it for $4.50!
I call this the "I Don't Plan On Showering At All Today" look.
Toggle Coat: Thrifted, American Eagle
Denim Shirt: H&M
Wool Scarf: Thrifted, Marshall Field's
Leggings: AA Navy Winter Leggings
Shoes: Doc Martens
Nail Polish: Essie's Mint Candy Apple
Glasses: Chanel
Sleeping Kitty: Mappy
Next post will be very, very soon! Happy fall!
Friday, September 3, 2010
Pillow Cookies
Bakerella is one of my favorite food blogs; it combines beautiful photography with easy to follow recipes and delicious outcomes! What could be better? Last week, I discovered her recipe for Pillow Cookies and almost died because of how amazing they looked, and I knew I had to recreate them. I had most of the ingredients on hand, besides the brownie mix, so it was a pretty impulsive act. I tweaked a few things here and there (mostly due to me running out of some things... oops), but the recipe is almost identical!
Pillow Cookies
Recipe adapted slightly from Bakerella.
What You'll Need:
1 package brownie mix (plus whatever ingredients it calls for... mine called for eggs, vegetable oil and water)
1 cup butter, room temperature
1 1/4 cup packed brown sugar
1/4 cup white granulated sugar
2 large eggs, plus 1 egg yolk
1 tablespoon vanilla
2 1/2 cups all purpose flour
2 teaspoons baking powder
1/2 teaspoon coarse salt
1/2 teaspoon baking soda
1 1/2 6 oz chocolate chips
First, make the brownies as per the the box directions. Let them cool and then chop them up into 10 little cubes slightly over an inch wide and put aside. You can do whatever you please with the rest, I saved them for later of course... (actually I just ate them all while I made the cookies.)
To start making the cookie dough, place butter in the bowl of a mixer and mix at a high speed until creamy.
Next, add in brown sugar and continue mixing until smooth.
Then, add in eggs, yolk and vanilla and continue mixing until smooth.
In another bowl, throw in flour, baking powder, baking soda, and salt and mix together.
Add flour mixture to butter mixture and beat at medium speed until combined and smooth-ish. Stir in chocolate chips.
Next, and this is CRUCIAL: refrigerate for at least an hour (I did 1hr and 20mins).
Preheat oven at 350 degrees.
Grab a sturdy 1/2 cup measuring cup to scoop out batter. I used my hands to pack it in tightly and a spoon to scoop it out of the scooper (haha). It's going to get messy, but you need to do this quickly so the dough stays chilled.
After scooping 1/2 cup of batter, make a little hole in it and place a brownie square in it. Roll it together to form a ball and have the brownie sitting snugly in the middle.
Then, place the ball on a baking sheet with parchment paper. I found it easier to do it one at a time, but I only had room to bake 5 at a time so I did 5 in succession. Keep the rest of the dough refrigerated until you bake the second batch.
After you have all 5 on the baking sheet, bake at 350 degrees for about 19 mins.
Let them cool on the baking sheet for a few mins then transfer on to a cooling rack.
Enjoy!
I found that they had a more scone-like texture but it was definitely a good thing; especially considering I had some with my coffee the next two mornings; and it was AMAZING. They stayed moist and great for the next 3 days, too (they might have lasted longer had we not eaten them all)! They are extremely rich and HUGE so I found that even one at a time was a bit too much, but definitely delicious and worth making.
Cheap, Easy, Kind-of-Healthy Eats: Tuna Pasta Salad
One of the many reasons I started this blog was to share some of my recipes for cheap, easy food. Andrew and I are on a pretty small budget and we're trying to be/eat healthy (sort of...), but we definitely make the best of it! So, we will document our tried-and-true recipes AND our experiments and have weekly posts with Cheap, Easy, Kind-of-Healthy Eats!
For our first recipe post, we've got Tuna Pasta Salad. It might be kind of boring, but definitely cheap, easy and delicious! It's a big comfort food for me, not to mention that it's good for me to take to work for lunch seeing as we don't have a microwave (but we do have a fridge)!
I will warn y'all: My camera is at the repair shop till he 15th of September so unfortunately both the blog and my etsy shop will be suffering due to this. Please excuse my crappy iPhone pictures!
What You'll Need:
While the pasta is boiling, chop up your 1/2 onion and tomato and place in a bowl.
Then, drain two cans of tuna to get rid of the liquid and throw in bowl with onion/tomato. Mix together.
Next, add in mayonnaise and salt and pepper. Cover and place in the fridge.
When the pasta is done cooking, rinse in cold water and add olive oil and more crushed pepper. Combine with tuna/onion/tomato mixture. Cover and refridgerate until cool, about 20 mins.
Right before serving, mix in washed baby spinach leaves into the pasta and serve! Bon appetit!
Let me know what you think of this recipe! Also, for this interested, I will be updating my etsy shop with new things tonight!
For our first recipe post, we've got Tuna Pasta Salad. It might be kind of boring, but definitely cheap, easy and delicious! It's a big comfort food for me, not to mention that it's good for me to take to work for lunch seeing as we don't have a microwave (but we do have a fridge)!
I will warn y'all: My camera is at the repair shop till he 15th of September so unfortunately both the blog and my etsy shop will be suffering due to this. Please excuse my crappy iPhone pictures!
What You'll Need:
- 1 box of Farfalle
- 2 cans (5oz) of Solid White Albacore
- 1/2 of a medium Red Onion
- 1 small Tomato
- 1/4 cup of Mayonnaise (or more if you love mayonnaise like I do)
- 2 cups Baby Spinach leaves
- Salt + Pepper to your liking
- 2 tbsp Olive Oil
While the pasta is boiling, chop up your 1/2 onion and tomato and place in a bowl.
Then, drain two cans of tuna to get rid of the liquid and throw in bowl with onion/tomato. Mix together.
Next, add in mayonnaise and salt and pepper. Cover and place in the fridge.
When the pasta is done cooking, rinse in cold water and add olive oil and more crushed pepper. Combine with tuna/onion/tomato mixture. Cover and refridgerate until cool, about 20 mins.
Right before serving, mix in washed baby spinach leaves into the pasta and serve! Bon appetit!
Let me know what you think of this recipe! Also, for this interested, I will be updating my etsy shop with new things tonight!
Subscribe to:
Posts (Atom)


